
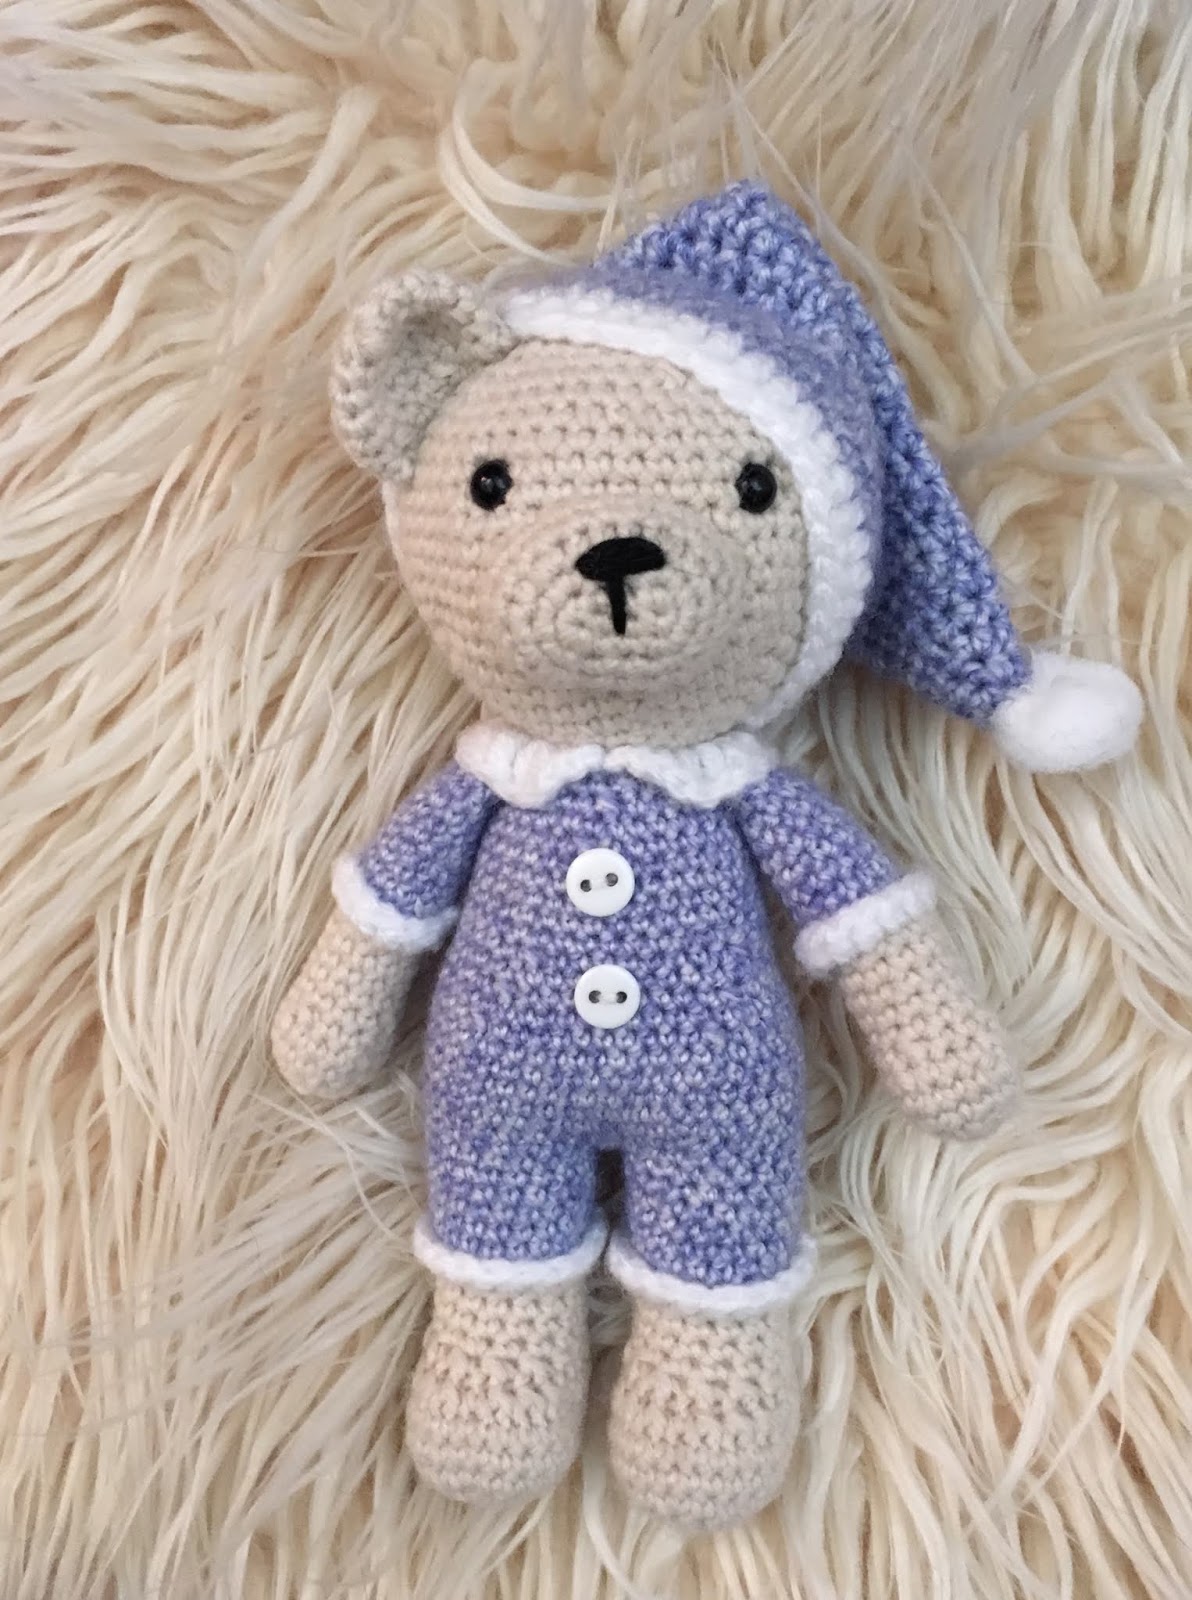
Night Bear

You will need:
· Yarn needle
· Soft toy filling
· 7mm safety eyes
· 3mm crochet hook
· Optional - 2 white buttons and 1 white pom pom
· DK Yarn – Approx. 210m
o Stylecraft Batik DK – blue (lupin) or pink (coral)
o Stylecraft Batik DK – cream
o Hayfields Bouns DK – white
o Small piece of black yarn for nose
Stitches and abbreviations used: (US terminology is used
- MR - Magic ring (sc unless otherwise specified)
- Ch - Chain
- SC - Single crochet
- Inc - Increase stitch (2 single crochets into one stitch)
- Dec - Decrease stitch (single crochet 2 stitches together)
- ST(s) – Stitch/stitches
- HDC – Half double crochet
- DC – Double Crochet
- TR – Treble Crochet
- SLST - Slip stitch
- BLO – Back Loop Only
- FLO – Front Loop Only
- R – Round or Row
- FO - Finish Off
Other things to note....
- Most of this pattern is worked in continuous rounds. It is helpful to use a stitch marker to keep track.
- The number in ( ) at the end of each round indicates the total stitch count for that round.
- * * indicates repeated series of stitches.
- Use invisible decreases for a neater finished product. This is done by using the FLO of the stitches while making the decrease.
- Changing colour - Complete the stitch before the colour change by working the last yarn over of the stitch with the new colour.
- Stitches in [ ] are worked into one stitch.
- Read pattern through fully before starting as it is easier to make other pieces during the construction of the main piece.
Main Piece - Starting in Cream
| |
1.
|
CH 5.
|
2.
|
1sc in the 3rd chain from the hook, 1sc into the next chain, 3sc into the last chain, 1sc into the back of each 2 chains, 3sc into the space between the skipped chains 1 and 2. (10)
|
3.
|
2sc, inc x3, 2sc, inc x3 (16)
|
4.
|
2sc, *1sc, inc * x3, 2sc, *1sc, inc * x3 (22)
|
5.
|
2sc, *2sc, inc * x3, 2sc, *2sc, inc * x3 (28)
|
6-7.
|
Sc (28)
|
8.
|
3sc, dec x3, 1sc, dec x3, 12sc (22)
|
9.
|
1sc, dec x6, 9sc (16)
|
10-12.
|
Sc (16)
|
13.
|
Change to blue – BLO – *3sc, inc * x4 (20) **See leg cuffs – page 3
|
14-20.
|
Sc (20) – Start stuffing the piece.
|
FO 1st leg with 1slst into the same st as the last sc of the round. Leave a long yarn tail to close any joining gaps. Make and continue the 2ndleg (R1-20).
Put a marker into st 14 on R20 of the 1st leg to help identify it later.
| |
21.
|
3sc into 2nd leg, 1sc into st 14 of 1stleg, 19sc around 1st leg, 1sc into st 4 of 2nd leg, 16sc around the 2nd leg (40)
This joins the legs and make a new larger round.
|
22.
|
*9sc, inc * x4 (44)
|
23.
|
*10sc, inc * x4 (48)
|
24-27.
|
Sc (48)
|
28.
|
10sc, dec * x4 (44)
|
29.
|
Sc (44)
|
30.
|
*9sc, dec * x4 (40)
|
31.
|
Sc (40)
|
32.
|
*8sc, dec * x4 (36)
|
33-37.
|
Sc (36)
|
38.
|
*7sc, dec * x4 (32)
|
39.
|
Sc (32) - continue to stuff.
|
40.
|
*6sc, dec * x4 (28)
|
41.
|
*5sc, dec * x4 (24)
|
42.
|
*4sc, dec * x4 (20)
|
43.
|
Change to cream – BLO - *8sc, dec * x2 (18) **See collar - page 3
|
44.
|
*2sc, inc * x6 (24)
|
45.
|
*3sc, inc * x6 (30)
|
46.
|
*4sc, inc * x6 (36)
|
47.
|
*5sc, inc * x6 (42)
|
48.
|
*6sc, inc * x6 (48)
|
49.
|
*7sc, inc * x6 (54)
|
50-59.
|
Sc (54) place the eyes between approx. R54-55, 9sts apart making sure to have the feet facing forward.
|
60.
|
*7sc, dec * x6 (48)
|
61.
|
*6sc, dec * x6 (42)
|
62.
|
*5sc, dec * x6 (36) continue stuffing until closed.
|
63.
|
*4sc, dec * x6 (30)
|
64.
|
*3sc, dec * x6 (24)
|
65.
|
*2sc, dec * x6 (18)
|
66.
|
*1sc, dec * x6 (12)
|
67.
|
*dec * x6 (6)
|
FO – Close hole.
| |
Leg Cuffs x2 – White
Note: This is easier to do before the legs are joined together.
Insert hook from the bottom of the foot upwards towards the leg, join white yarn into the FLO left from R13 of the legs. Slst yarn into place. (It does not matter which loop you start in.)
*7hdc, [2hdc] * x2 (18)
FO – hide yarn tails into the leg. Roll cuff upwards in a ‘turn up’ style.
| |
Collar – White
Note: This is easier to do before the head is fully made (around R45).
Starting in st 16 of the FLO left from R43 of the main piece/neck. (This is counted as it would be during making the original round)
Insert hook from the head downwards towards the body, join white yarn. This means you will now be working backwards along the round. i.e. the 1st st will be into st 16, the 2nd into st 15 etc.
(If st 16 is not central for you then adjust the accordingly)
[1slst, 1sc], 1hdc, [2dc], *1tr, [2tr] *x3, 2tr, *[2tr], 1tr * x3, [2dc], 1hdc, [1sc, 1slst] (30)
FO – hide yarn tails into the body. Roll collar down. When sewn on, the arm joins will be hidden under this. The collar can be tacked down to keep in place.
| |
Arms x2 – Starting in cream
| |
1.
|
6sc into MR (6)
|
2.
|
*Inc * x6 (12)
|
3.
|
*2sc, inc * x4 (16)
|
4.
|
*3sc, inc * x4 (20)
|
5.
|
*3sc, dec * x4 (16)
|
6.
|
*2sc, dec * x4 (12)
|
7-9.
|
Sc (12)
|
10.
|
Change to blue – BLO - *5sc, inc * x2 (14) **See arm cuffs
|
11-19.
|
sc (14) Stuff the hand firming and arm lightly, continue stuffing until end.
|
20.
|
*dec, 5sc * x2 (12)
|
21.
|
Fold flat – 6sc through both sides to close flat.
|
FO – Leaving yarn tail to sew the top of the arm to body just below the white collar at approx. R42.
| |
Arm Cuffs x2 – White
Note: This is easier to do before the arms are sewn to the body.
Insert hook from the bottom of the hand upwards towards the arm, join white yarn into the FLO left from R10 of the arms. Slst yarn into place. (It does not matter which loop you start in.)
*5hdc, [2hdc] * x2 (14)
FO – hide yarn tails into the arm. Roll cuff upwards in a ‘turn up’ style.
| |
Muzzle – Cream
| |
1.
|
CH 5.
|
2.
|
1sc in the 3rd chain from the hook, 1sc into the next chain, 3sc into the last chain, 1sc into the back of each 2 chains, 3sc into the space between the skipped chains 1 and 2. (10)
|
3.
|
2sc, inc x3, 2sc, inc x3 (16)
|
4.
|
2sc, *1sc, inc *x3, 2sc, *1sc, inc *x3 (22)
|
5-6.
|
Sc (22)
|
FO – Leaving yarn tail to sew to face. The top of muzzle will be at approx. R53. Stuff Muzzle as you sew.
Use a strand of black yarn to embroider on nose.
| |
Ear – Cream
| |
1.
|
6sc into MR (6)
|
2.
|
*inc * x6 (12)
|
3.
|
*2sc, inc * x4 (16)
|
4.
|
*3sc, inc * x4 (20)
|
5-6.
|
Sc (20)
|
7.
|
*dec, 2sc * x5 (15)
|
FO – fold flat and leave yarn tail to sew to one side of the head.
The bottom of the ear is sewn to approx. R54 (the same round the eyes are placed) and 4sts away from the eye.
| |
Hat – Starting in blue
| |
1.
|
4hdc into MR (4)
|
2.
|
*[2hdc] * x4 (8)
|
3.
|
Hdc (8)
|
4.
|
*1hdc, [2hdc] * x4 (12)
|
5.
|
Hdc (12)
|
6.
|
*2hdc, [2hdc] * x4 (16)
|
7.
|
Hdc (16)
|
8.
|
*3hdc, [2hdc] * x4 (20)
|
9.
|
Hdc (20)
|
10.
|
*4hdc, [2hdc] * x4 (24)
|
11.
|
Hdc (24)
|
12.
|
*5hdc, [2hdc] * x4 (28)
|
13.
|
Hdc (28)
|
14.
|
*6hdc, [2hdc] * x4 (32)
|
15.
|
Hdc (32)
|
16.
|
*7hdc, [2hdc] * x4 (36)
|
17.
|
Hdc (36)
|
18.
|
*8hdc, [2hdc] * x4 (40)
|
19.
|
Hdc (40)
|
20.
|
*9hdc, [2hdc] * x4 (44) – Check this is wide enough to fit around the head, if not, carry on increasing in the style until it fits.
|
21-27.
|
hdc (44)
|
28.
|
Change to white – hdc (44)
|
29.
|
Sc (44)
|
FO – leaving long yarn tail to sew to head. Position the hat behind the ear and slanted towards the opposite side.
Use a small piece of blue yarn to shape the hat and keep in place.
A small white pom pom can be placed on the tip of the hat if desired.
| |
Dress Seam – Starting in white (optional)
| |
1.
|
Ch 13
|
2.
|
Change to blue – 12sc. (Note that this option is shown on the pink bear)
|
FO – leaving yarn tails to sew down the centre of the body starting from the collar.
| |
Another option is to sew two white buttons to the centre of the body.(See Blue bear)
| |
1 comment:
these are adorable! thank you for sharing them. :-)
Post a Comment